
A photo wallpaper can change the interior beyond recognition. There are not only a lot of unusual patterns and colors available on the market, but also various materials from which photo wallpapers are made. Find out how to stick photo wallpaper to make its surface smooth and the effect lasting.
The market offers paper and vinyl photo wallpapers as well as photo wallpapers made of other materials, for example photographs on stretched canvas or thick PVC. The surface of the products can be smooth or uneven – imitating the structure of canvas, sand or other materials. Their sizes also vary greatly. Larger sizes are usually purchased in several pieces.
How to prepare a wall?
Before you start sticking wallpaper, you need to properly prepare the wall. Even if you use the best wallpaper glue , unevenness may be visible if you do not compensate for it first. The wall surface should be cleaned, leveled and dried thoroughly. Old layers of wallpaper, nails, handles and paint remnants must be carefully removed. If there are any defects on the surface, they should be filled with plaster or repair mass and then sanded. If the substrate is absorbent, it must be primed.
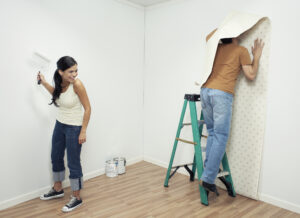
What are the next steps in sticking photo wallpaper?
Depending on the manufacturer’s instructions, the glue is applied to the photo wallpaper parts themselves or also to the wall. When installing a photo wallpaper consisting of several parts, it is extremely important to align the edges so that the resulting pattern is not “broken”. Paper photo wallpapers are most often glued with an overlap of several millimeters, starting from the ceiling, from the side closest to the window. The remaining types are usually laid butt-together, unless the manufacturer recommends otherwise. First, draw a plumb starting line, then grease each part with glue using a wide brush and glue it gently. It is also worth using a level when laying. Finally, press all the parts with a roller to avoid any air bubbles underneath, and remove excess glue with a damp cloth or sponge.